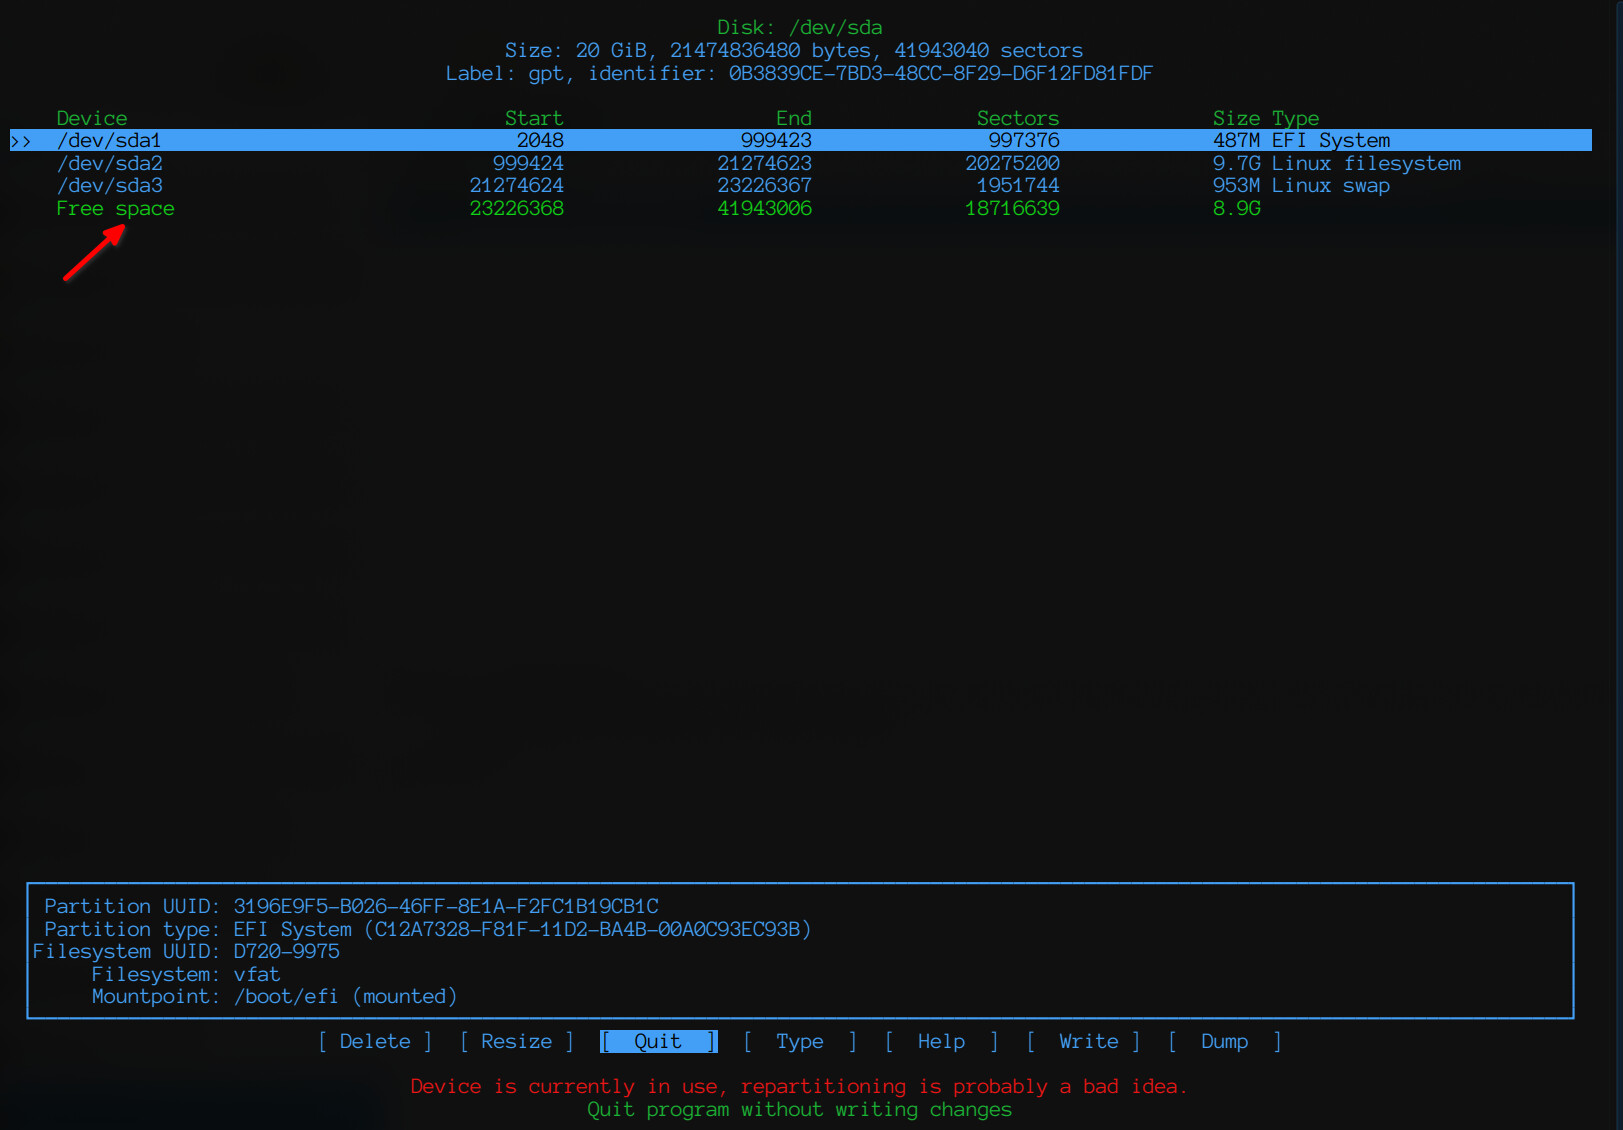
I don’t see the free space, are you sure you added it to the current disk? It must appear after sda5, something like this:
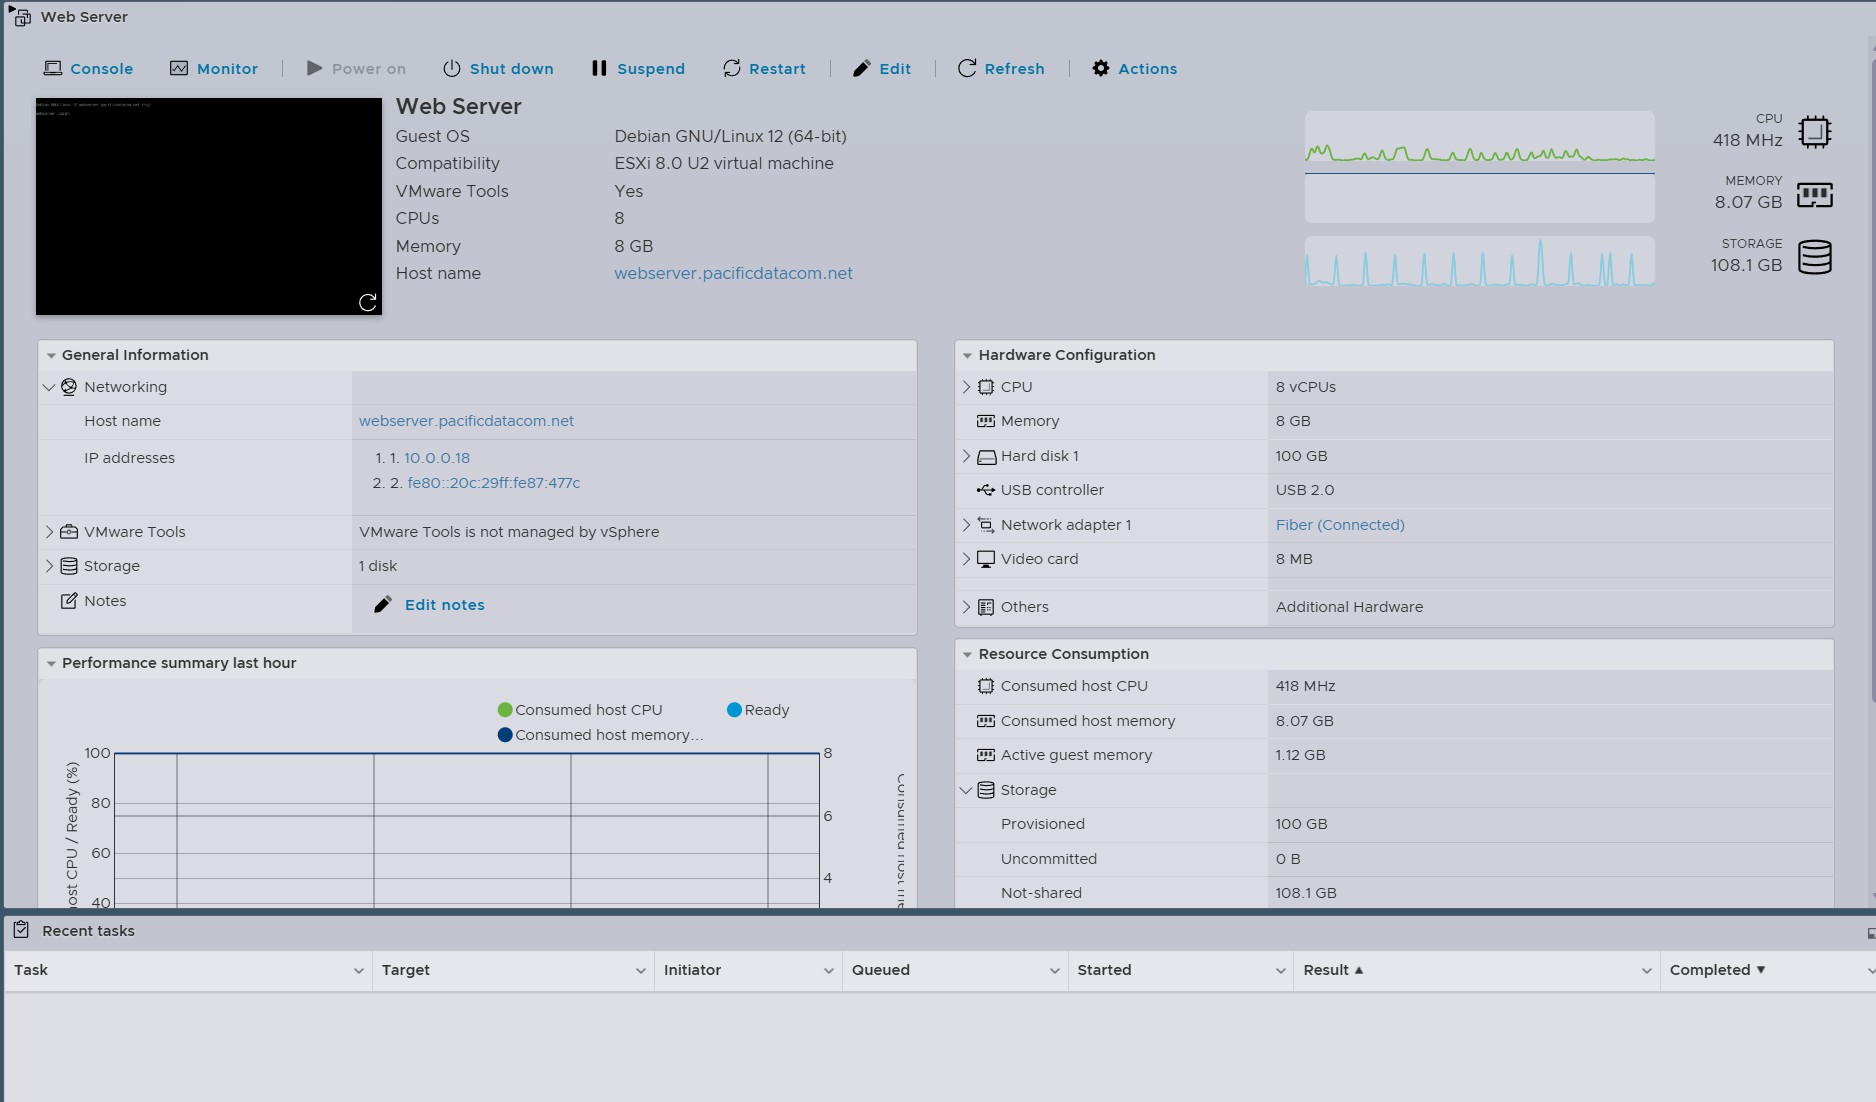
I just rebooted the web server maybe it didn’t take place?
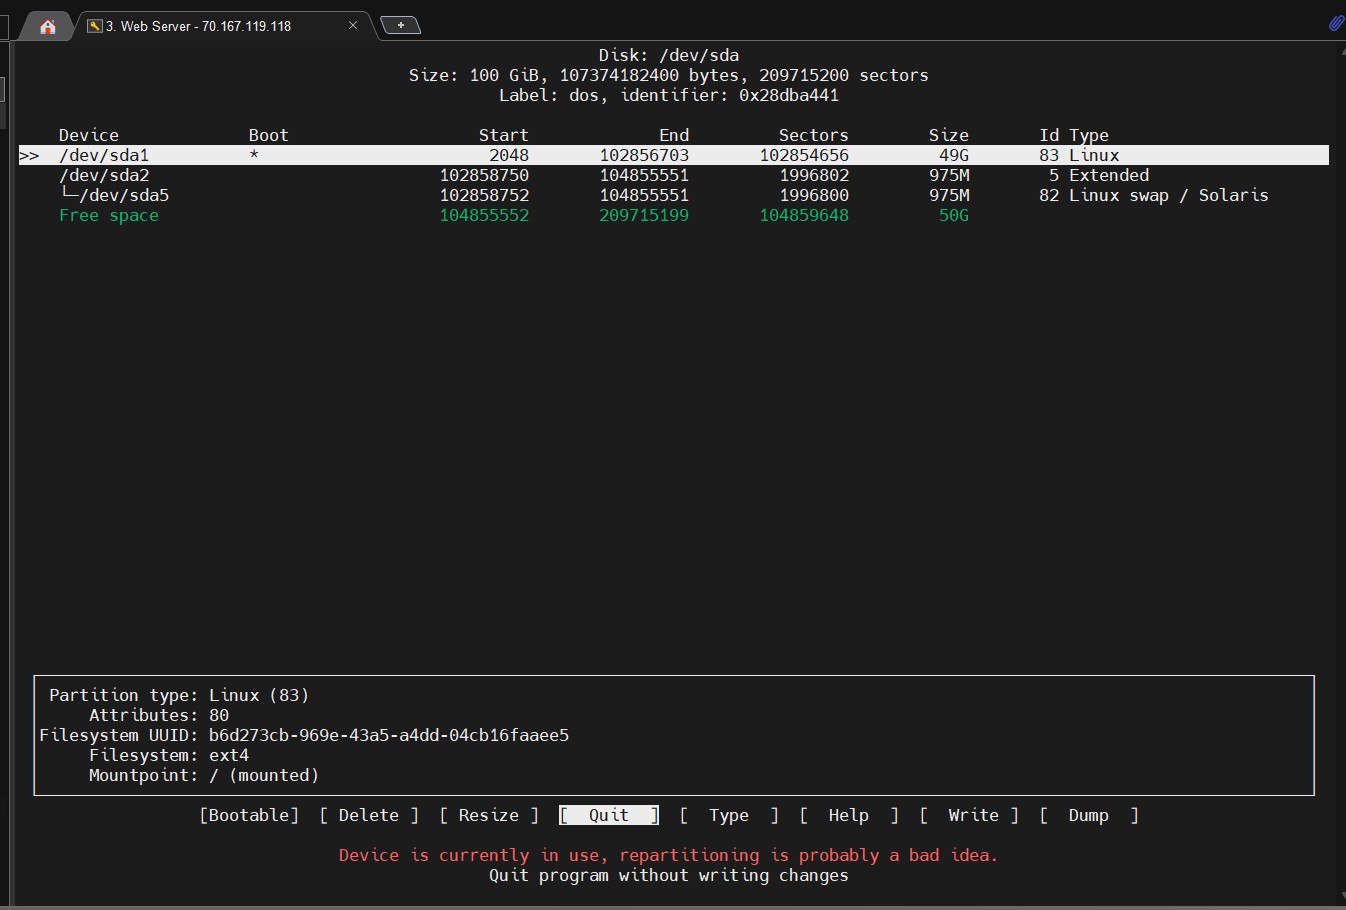
So how to move that to SDA1
Next time, you can use:
echo 1 > /sys/class/block/sda/device/rescan
Or
partprobe
So the kernel is informed about the partition table changes.
Two options.
1.- Using GParted… I know…, but it will allow to move the partitions to the end and resize sda1. But seems you have issues to boot he VM with the ISO and your web server will be down during the resizing.
2.- Disable swap, remove sda5 and sda2, resize with cfdisk sda1 (leaving 1G at the end of the disk for the swap), create a new swap partition using the remaining free space at the end of the disk, enable it, and use resize2fs to extend the filesystem on sda1.
What do you mean next time?
I just think it’s hilarious we just sent a rocket to the moon and we still can’t even figure out how to move one partition….
I guess Windows wins on that right.
In case you are in the same situation, so you can avoid a reboot.
GParted can do it 
I’m all over whatever you want to do? I have multi million dollar companies hosted on this web server I have to make sure I don’t do anything to their websites.
It’s too late here and this is sooooo off-topic on the forum.
Tomorrow I’ll send you a private message so we can continue the conversation and I’ll provide all the steps to remove the extended and swap partitions, resize sda1 and re-create the swap.
I’ve done it before I just can’t find my information to do it.
Thank you, Like I said I did it before and I can’t find my info.. It just kills me that this is not easy to find It should be super easy to find It’s crazy…..
You’re welcome 
To avoid these issues is worth to use LVM (Logical Volumes), in 10 seconds you have the new size, no partition issues, no dramas… 
Thank you I will work on this one of these days.
Also I still wish chron jobS showed up in the regular dashboard I hate them not being there now.
I did install LVM but I haven’t found the right video yet on how to do when I’m looking for the easiest way.
You can’t convert the root partition to LVM right now. Well, you could, but it’s more complicated and would require more downtime.
Did you see the private message I sent you? There’s a step by step guide explaining how to do what you want (I even made a video  ).
).
oh wow, let me look. I got busy with work during the week and I also have a fairly successful Youtube channel and I’ve been doing that all day.
We have fixed the issue, and the root filesystem (/) has been resized.
In case you’re curious, here are the steps we followed.
Note: Keep in mind that these steps apply to the configuration @johnnyz had, i.e., three partitions: sda1 for /, sda2 as an extended partition, and sda5 as swap inside sda2.
0.- Create a snapshot of the VM… just in case.
1.- Disable swap
swapoff -a
2.- Use cfdisk to delete sda2 (and sda5), resize sda1, create a new primary partition as swap, and write the changes.
cfdisk /dev/sda
- Select
/dev/sda2and Delete it (deletingsda2will deletesda5too). - Select
/dev/sda1and Resize it, using all space except 1G, which we will use for the swap partition. - Select the Free space and choose New, using all the remaining space. Create it as a Primary partition, then select Type and choose Linux swap / Solaris. Finally, select Write, confirm with yes, and QUIT.
3.- Now extend the filesystem.
resize2fs /dev/sda1
You can check that it now has the added space:
df -h /dev/sda1
4.- Recreate the swap:
Format the /dev/sda2 partition:
mkswap /dev/sda2
You will see a UUID like UUID=aaaaaaaa-bbbb-cccc-dddd-eeeeeeeeeeee. Copy it, as we will use it later.
Enable the swap:
swapon /dev/sda2
Now edit /etc/fstab and replace the UUID used for the swap with the new one you copied a couple of steps ago. Once modified, save the file and run:
systemctl daemon-reload
Then edit /etc/initramfs-tools/conf.d/resume and replace the UUID with the new one as well. Once modified, save the file and run:
update-initramfs -u
And that’s all. To make sure everything is working correctly, reboot the VM.